This guide outlines the steps required to deploy your own instance of The Misinformation Game on Firebase. At the end of this guide, you will have your own website hosted at your own custom URL, (e.g. https://misinformation-game.web.app).
This guide assumes that you have familiarity with installing software and using the command line. If you are not familiar with these processes, then the non-technical installation guide may be easier to follow.
Deployment of this project requires the use of NPM to install its dependencies. A guide to install NPM can be found in the NPM Docs.
Once you have NPM installed, run the following commands to download the source code of this project,
cd [path/to/download/project/into]
git clone https://github.com/TheMisinformationGame/MisinformationGame
cd MisinformationGame
In the above commands, replace [path/to/download/project/into]
with a path to where you want the source code of the project
to be downloaded on your computer. The source code will be
created as a new directory in that path, so ~/Documents is
a sensible option (e.g. cd ~/Documents).
You will now need to create your own Firebase project, and link to it from the source code.
Navigate to the Firebase Console at https://console.firebase.google.com/ to create your project. Make sure that you have the correct Google account selected in the top-right of the page.
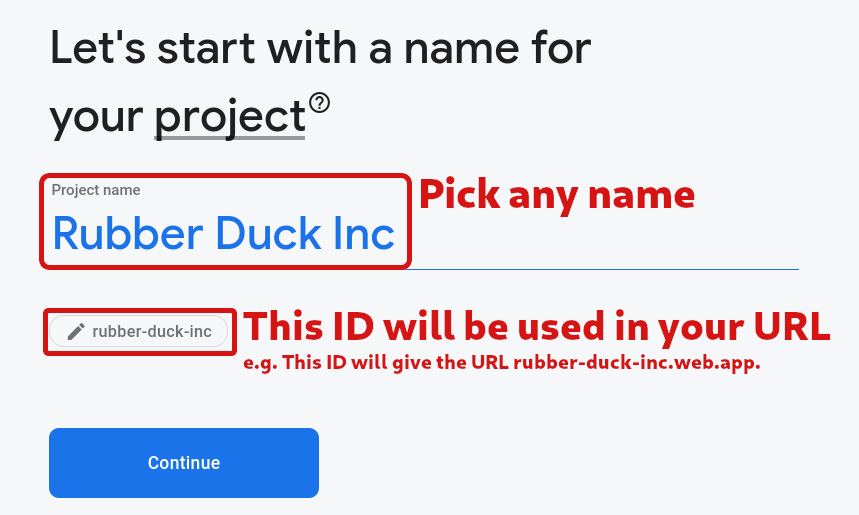
Click the Add Project button to create a new Firebase project. This will open a screen where you can choose a name for your deployment of The Misinformation Game. The URL of your website is configured below the Project Name input (it is small). This URL will be shown to participants of your studies. Therefore, you may wish to choose an ambiguous name, so that participants are not influenced by the URL.
Once prompted, you should also disable Google Analytics, and then continue. We do not make use of Google Analytics, and therefore it is good to turn it off for the privacy of users.
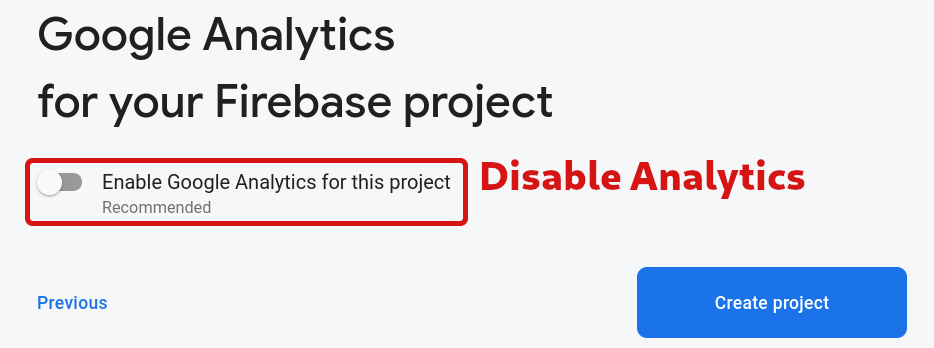
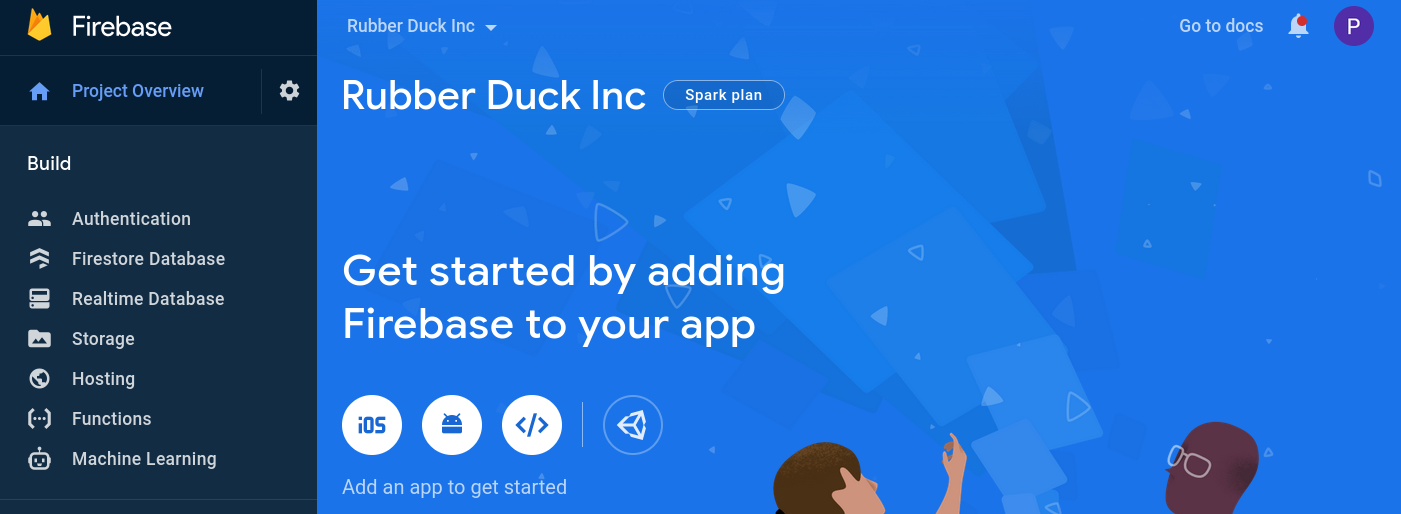
Firebase will now take some time to generate your new project. Wait until it is complete, and then select Continue. You should now be redirected to the Firebase console for your project.
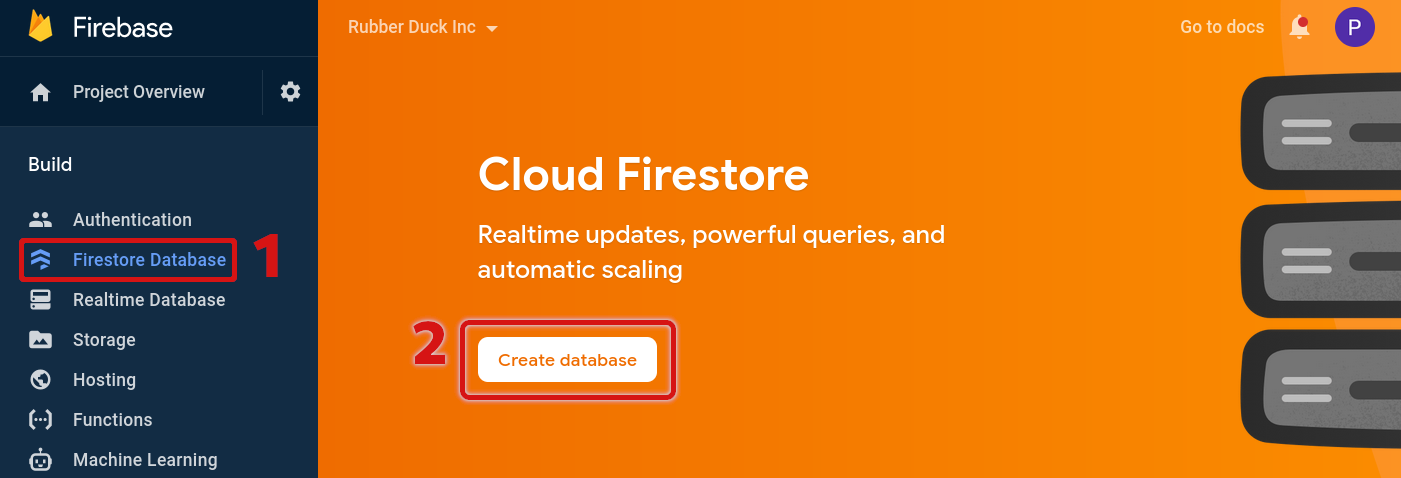
The Misinformation Game uses Firestore to store the studies and their results, however it is not enabled by default. To enable Firestore, navigate to Firestore Database from your Firebase console and click the Create Database button.
You will next be prompted to select whether to create the database in Production or Test mode. Make sure that Production Mode is selected, and then click Continue.
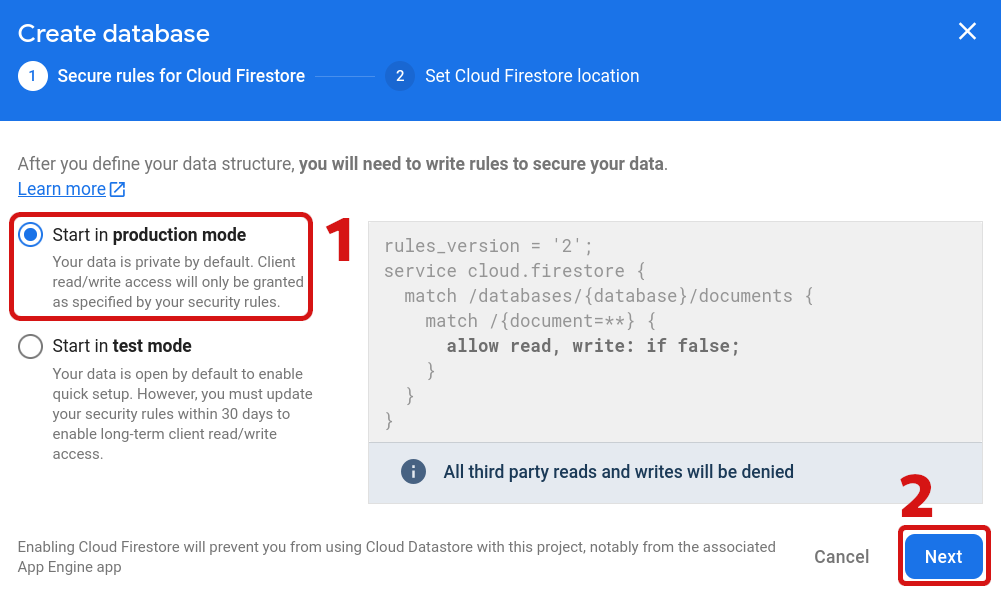
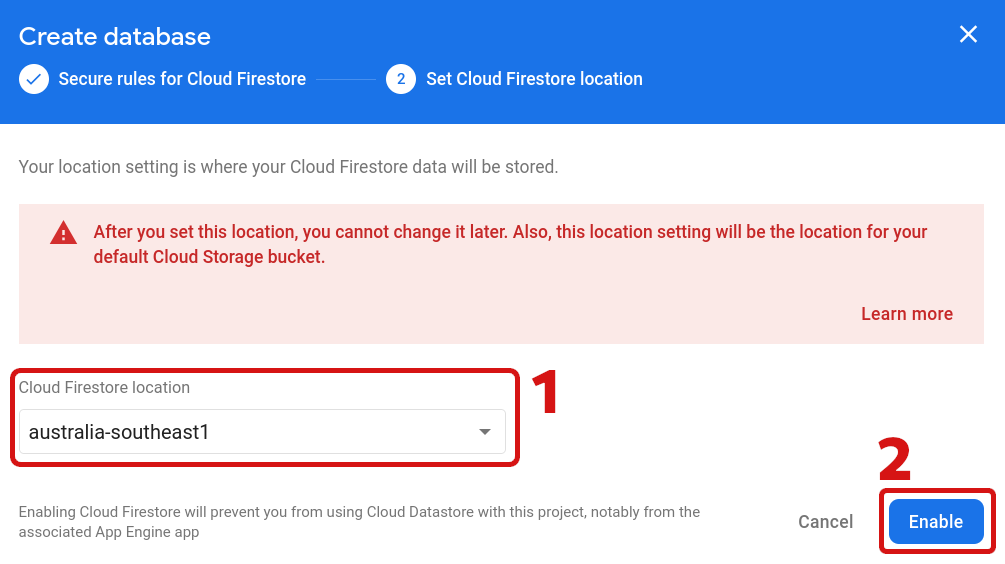
You will then be prompted to select a region to host the database in. For best results, choose a region that is close to where you and your participants will access the game.
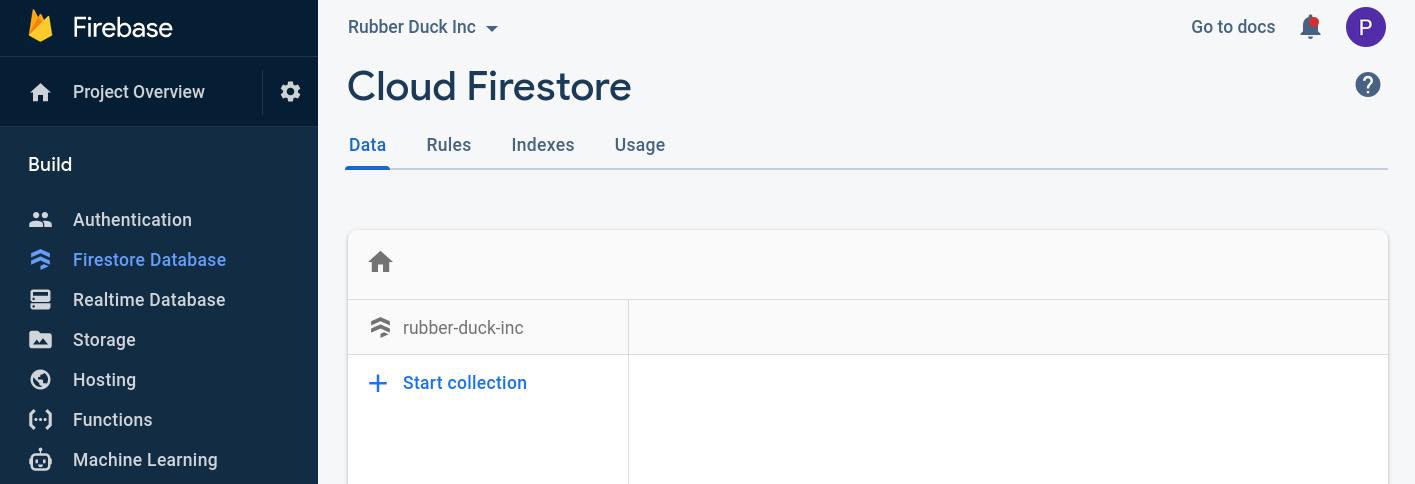
Your Firestore database should now be created! You should see a screen like the one below.
Any images that are embedded within studies will be stored within Firebase Storage. Therefore, Firebase Storage will need to be enabled for your Firebase project.
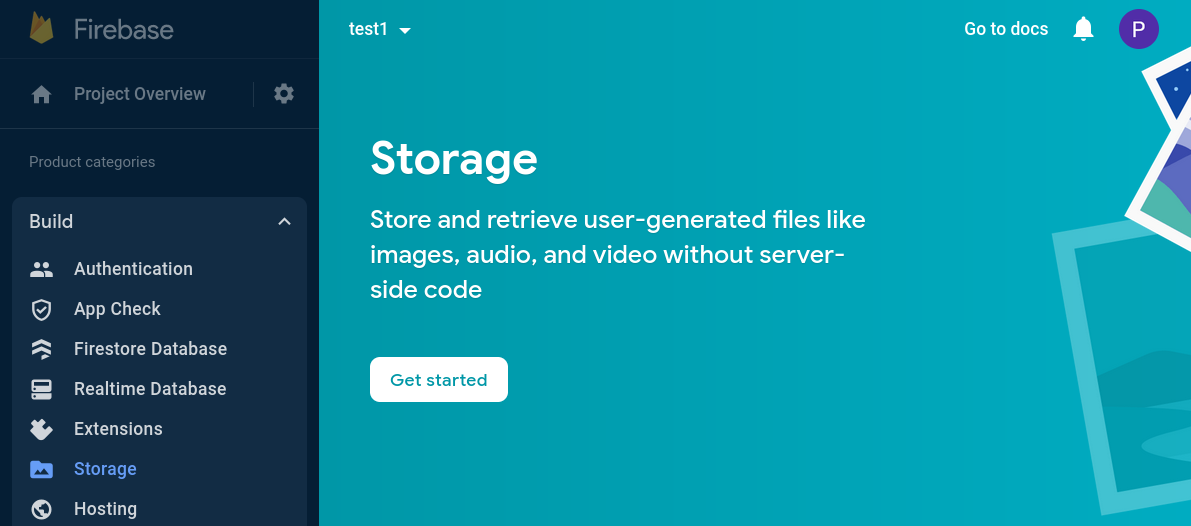
Step 1: Select Storage under the Build tab on the left of the project page.
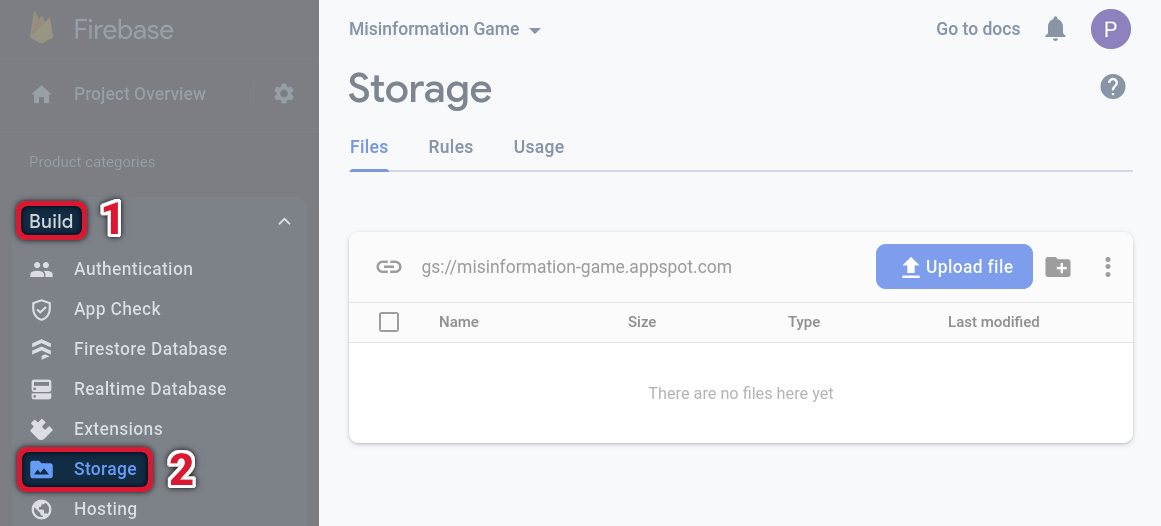
Step 2: Your storage should now be set up. If you see a page that looks like the page shown above, then this has been successful. However, if you see the Get started page, as shown below, then you will need to first enable the Firestore Database as explained in the Enable Firebase Firestore section of this guide. This should automatically enable Firebase Storage when you start Firestore in production mode.
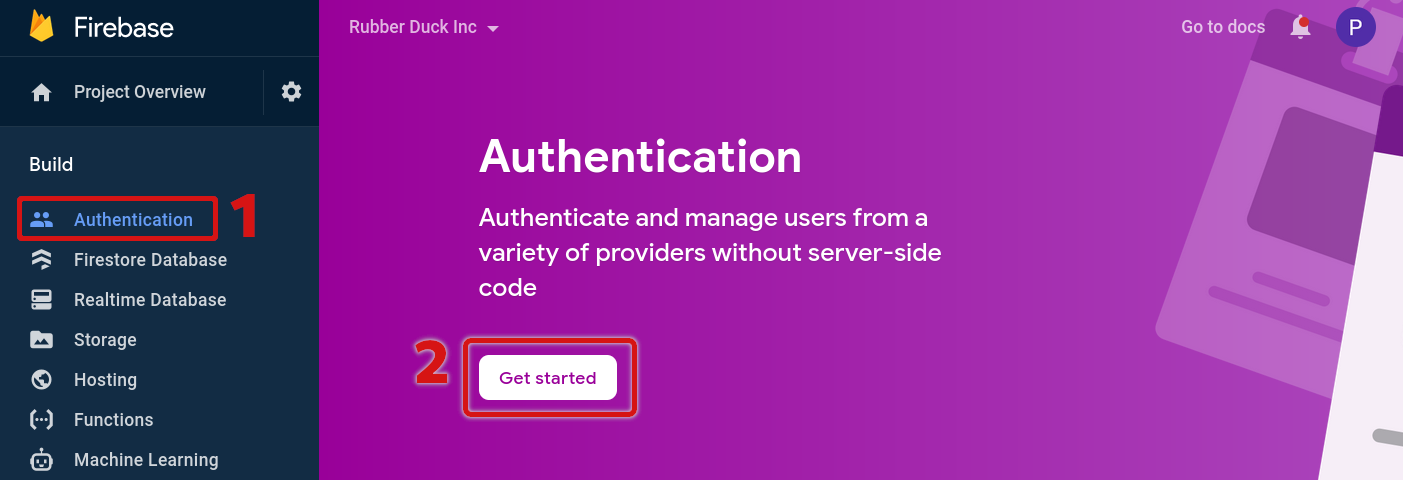
The Misinformation Game uses Google accounts to authenticate researchers so that only they can access their studies. To enable Google Authentication, navigate to Authentication in the Firebase console and click the Get started button.
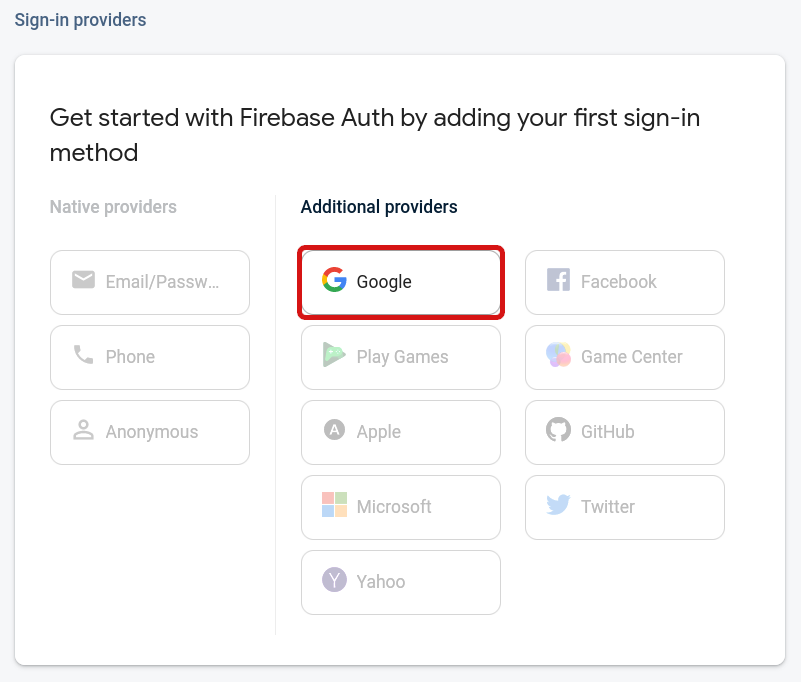
You should now be shown several Sign-in providers. Click on Google underneath Additional providers.
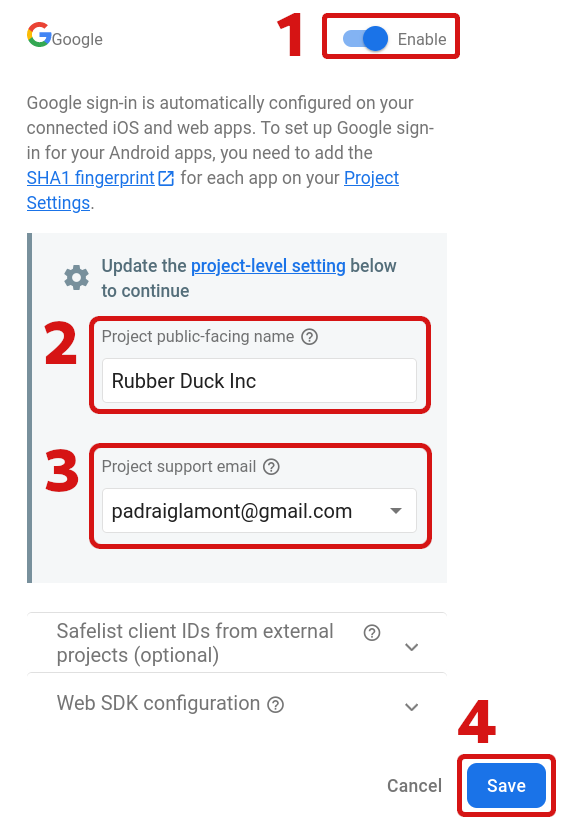
You will now be shown a screen where you can setup the Google Authentication. Toggle Google authentication to enabled in the top-right. You should now be shown fields to enter the public-facing name and email for your project. This name and email will be shown to users who sign up using the Google authentication. Once you have entered your public-facing name and email, click Save.
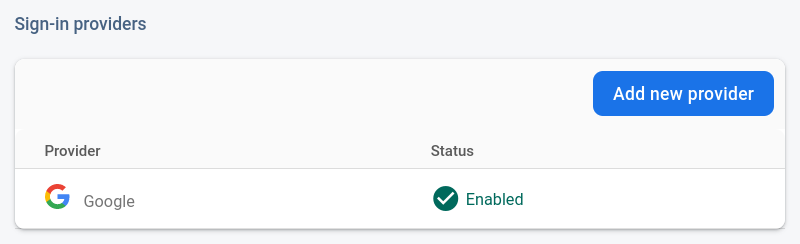
Firebase will now setup the Google authentication for you, and then you should be redirected to a screen that shows the Google authentication as Enabled.
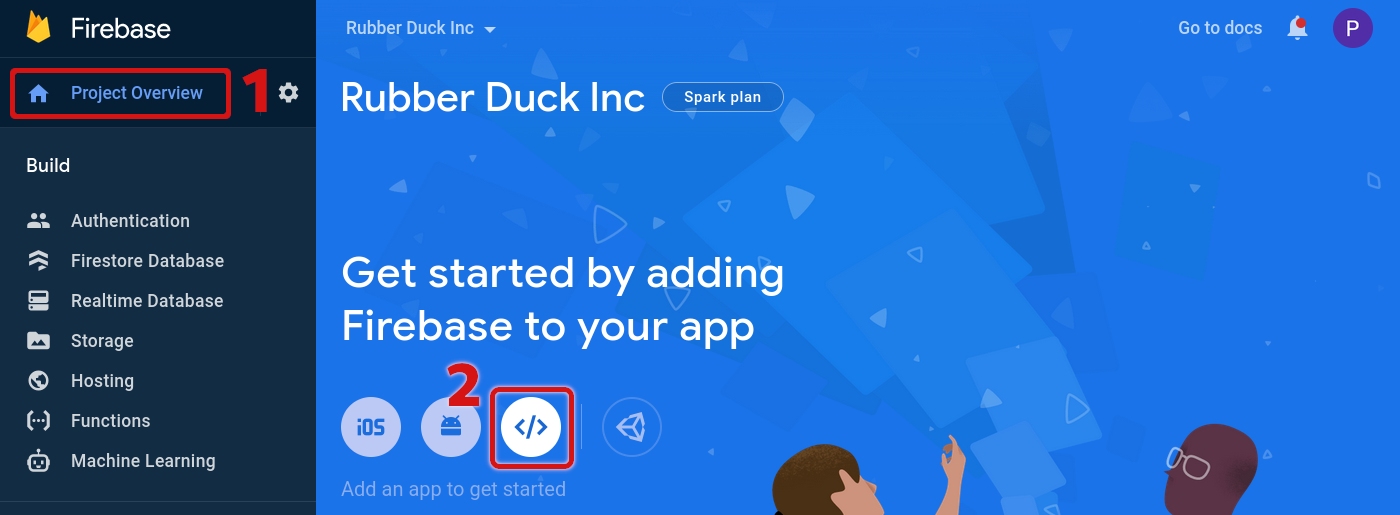
To connect the source code to your deployment, you must
create a Web App for your Firebase project. To do this,
navigate to the home-page of your Firebase project from
the console by selecting the Project Overview button.
There should be an icon on the home-page that looks like
</> that you can click to create a new Web App.
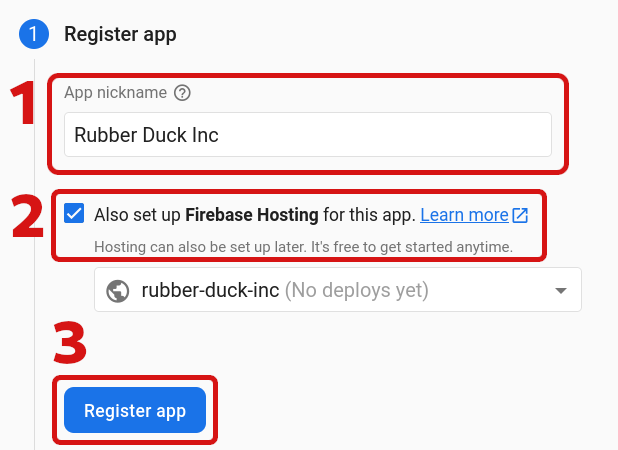
Once you have started the process to add a web app, you should be shown a window titled Add Firebase to your web app. Enter your project name, and select the checkbox to set up Firebase Hosting. You can then click Register app to continue to the next stage.
You will now be shown several steps to set up the source code of your Web App, however we have already done this so all of these steps can be skipped. Just click Next past the Add Firebase SDK and Install Firebase CLI steps. Finally, click Continue to console to skip deploying to Firebase. We will perform this step later.
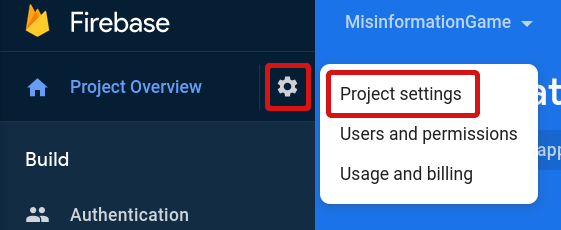
From the home-page of your Firebase console, navigate to the project settings by selecting the cog wheel in the top-left, and then Project settings.
If you scroll down on the Project settings page, you should be able to find information about your Web App. You need to find the section titled SDK setup and configuration, and select Config.
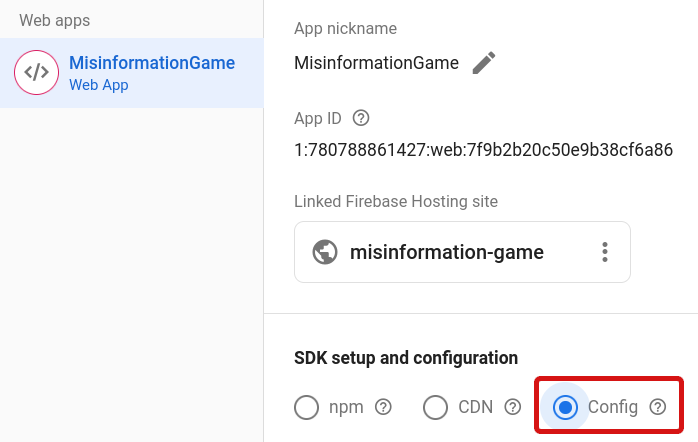
You should now be shown a code snippet containing your Firebase configuration object. It should look similar to the code snippet below.
const firebaseConfig = {
  apiKey: "AIzaSyDbBqOrit6Kj3FUsmI3i3AOOu27PLtkwTM",
  authDomain: "misinformation-game.firebaseapp.com",
  projectId: "misinformation-game",
  storageBucket: "misinformation-game.appspot.com",
  messagingSenderId: "780788861427",
  appId: "1:780788861427:web:7f9b2b20c50e9b38cf6a86"
};
Your configuration object must be entered into the config file
/config/firebase-config.js in the source code. Navigate
to the source code that you downloaded in step 1. There
should be a directory named config, with a file
firebase-config.js inside. Open that file in a text
editor and replace the configuration object shown above
with your own configuration object from your Firebase console.
You should only need to replace the lines that look like the
code snippet above, and you should not edit anything else in
the file.
Error if configuration is not set correctly:
If you do not edit the config file correctly, then you will not be able to sign in to your instance of The Misinformation Game. If your configuration object is wrong, then you may be shown the following error when signing in:
You could not be signed in:
This domain is not authorized to run this
operation. Add it to the OAuth redirect domains
list in the Firebase console -> Auth section ->
Sign in method tab.
The Misinformation Game has the helper script deploy.sh to help you to deploy to your Firebase project. It can be run using the following command from within the MisinformationGame directory,
./deploy.sh
This script will take you through several steps to install dependencies, initialise your project, and deploy it to your live website.
==========================
Installing dependencies...
==========================
This step may take some time to install all the dependencies of The Misinformation Game using NPM.
==================================
Installing the Google Cloud SDK...
==================================
This step will download and install the Google Cloud SDK that will later be used to configure the CORS settings for the storage of images in the app.
If you don’t have Python 3 installed, you may be prompted for your password so that the script can automatically install Python 3 for you.
=========================================================
Connecting to Firebase, you may be prompted to sign in...
=========================================================
This step will prompt you to log in to your Firebase account, so that the Firebase project you created can be accessed.
You may also be prompted to allow Firebase to collect
CLI usage and error reporting information. You can just
press the enter key to accept it, or you can type n
and the enter key to disable the analytics.
=================================================================
Please select the Firebase project you would like to deploy to...
=================================================================
This step will ask you to select the Firebase project you created, so that we can deploy the website to the project. Enter the number next to the name of your Firebase project and press the enter key.
echo "==========================="
echo "Building the application..."
echo "==========================="
This step will compile the application so that it can be deployed. This step may take some time.
========================================
Deploying the application to Firebase...
========================================
This step will deploy your application to your Firebase project! After this step, you will be able to access your website from its .web.app domain. However, the game will not function correctly as the website will not be able to load the avatars of sources, or the images for posts.
============================
Initialising Google Cloud...
============================
This step will ask you to initialise the Google Cloud SDK to point to your account and project. You will be prompted for several inputs through this process.
Step 1: You may be asked to pick a configuration
to use. If you are asked, then select the option to
Re-initialize this coniguration.
Step 2: You will be asked whether you would like to log in. If you are already signed in, you may select your account. Otherwise, press the enter key to state that you would like to sign in.
Step 3: If you were not already signed in, a browser should be opened where you can sign in to the same account that you used for your Firebase project. If your browser is not automatically opened, there should be a URL in the terminal that you can copy into a web-browser. When copying values from the terminal, you will likely have to press the shift key as well as the usual Cmd-C or Ctrl-C keyboard shortcut. This is required, as most terminals use the Cmd-C or Ctrl-C keyboard shortcuts to exit the current program.
Step 4: You will next be asked to pick a cloud project to use. Enter the number in square brackets next to the name of your Firebase project.
===============================================
Setting up the CORS settings for the website...
===============================================
This step will update the CORS settings of your website so that the images for sources and posts can be loaded. You will be prompted for your project’s .appspot.com domain. This domain is the same as your .web.app domain, just with a different extension. For example, for the example website for this project, misinformation-game.web.app, you would have to enter misinformation-game.appspot.com.
======================
Successfully Deployed!
======================
Your Firebase project should now be hosted at the URL you set up in step 1!
You should now have successfully deployed your own instance of The Misinformation Game! However, before you can upload studies, you will need to register your Google account as an administrator. A guide to register users as administrators can be found in the Administrators documentation. I hope The Misinformation Game proves useful for your research!
We share updates about the Misinformation Game in our Slack channel. If you wish to stay up-to-date, or if you’d like to share what you’re working on in relation to the Misinformation Game, please join our community on Slack!
Back to Top